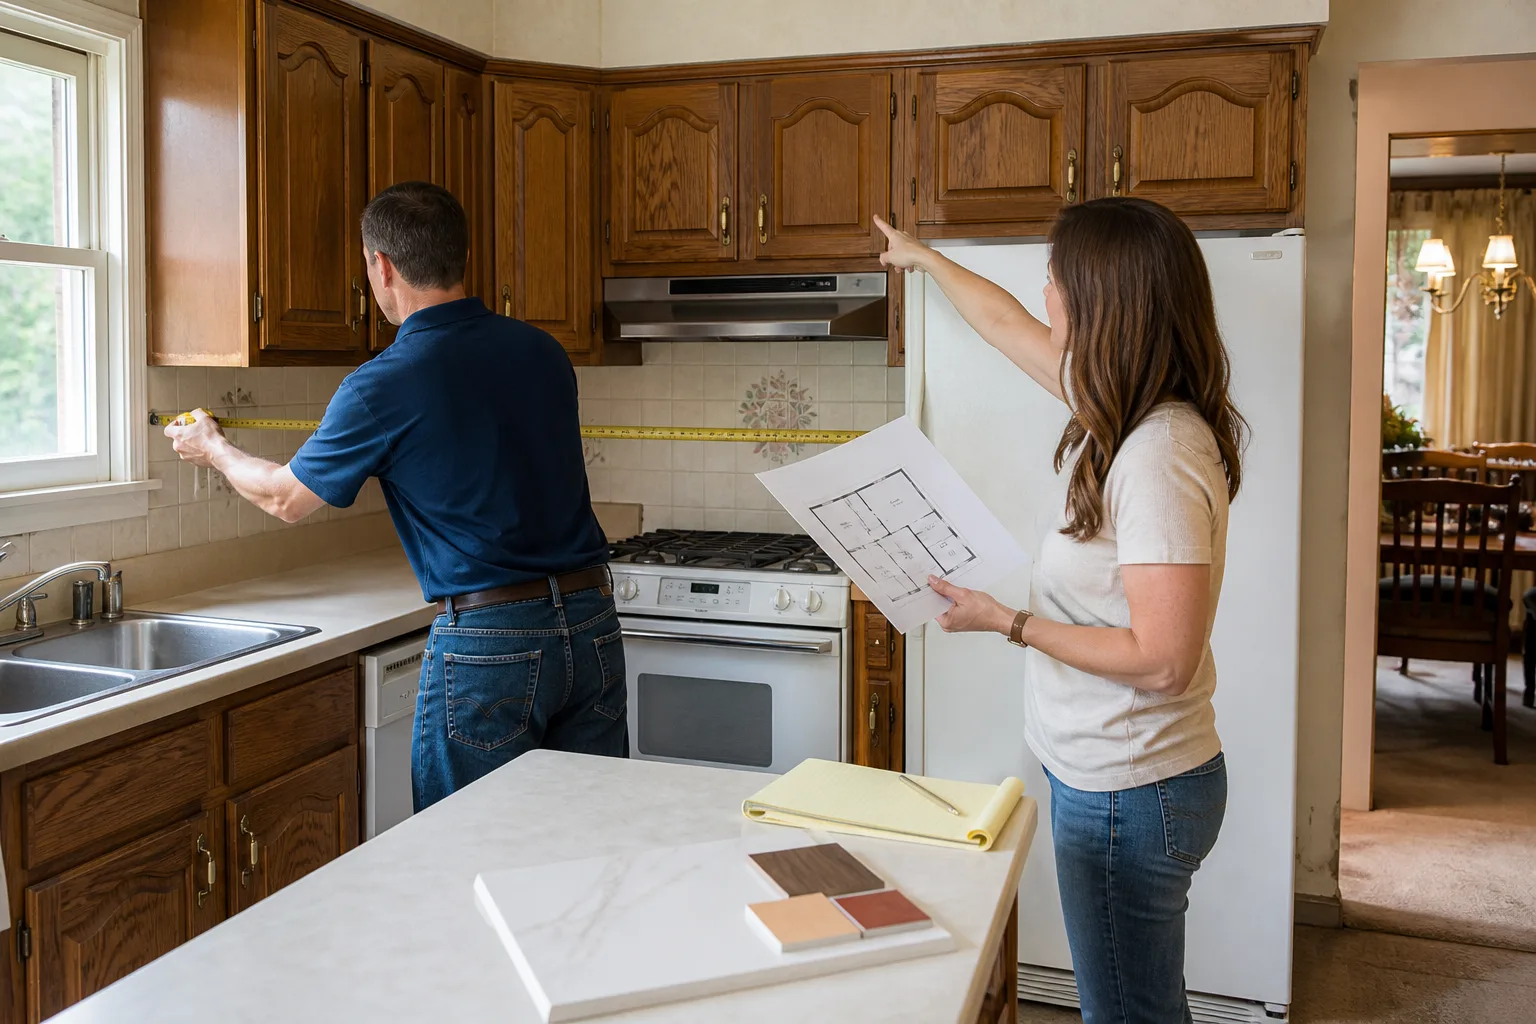
Last updated November 17, 2026





Free written scope consultation - allowances, timeline, and change-order rules on paper before a single trade is scheduled
Construction Warning Signs: A Huntington Beach Homeowner’s Reference Guide
A fresh coat of paint over exterior stucco is one of the most common ways a motivated seller, or a flipping contractor, hides active moisture intrusion in coastal California homes. Stucco is a sponge when it’s not detailed correctly, and paint is the cheapest way to make a water stain disappear for a month. We’ve walked into Huntington Beach houses where the listing photos looked immaculate and the back wall was soft enough to push a screwdriver into. This guide covers the physical evidence that a previous contractor cut corners, the signs you can actually see, hear and smell, and how to document them before you hire anyone so the scope of work is tied to real facts instead of a verbal description.
Quick Answer
The most reliable construction warning signs in a Huntington Beach home are physical, not behavioral: rust weeping at fastener heads through stucco, chalky white efflorescence at the slab edge, mismatched ceiling heights at an addition wall, missing inspection stickers in the electrical panel, hollow-sounding tile underfoot, and grout cracks that follow a straight line. Any one of these means someone built or repaired something without the detail work that makes it last. Two or more in the same area usually means the job was done without a permit or without a license. Document them with dated photos before you request bids.
Styles & brands we work with
- Kitchen remodeling
- Bathroom remodeling
- Home additions & ADU
- Roofing
- Windows & doors
- Driveway & pavers
- Fence
Table of Contents
- What visual cues tell you work was done without a permit?
- Which moisture and corrosion signs are unique to Huntington Beach homes?
- How can you tell a tile or flooring job skipped substrate prep?
- What electrical and plumbing shortcuts show up during remodels?
- How to read an attic for cut corners
- How to photograph and document warning signs before hiring
- How to turn evidence into a written scope of work
What visual cues tell you work was done without a permit?
Huntington Beach permits leave a paper trail, but the physical trail is what matters once you don’t have access to the seller’s files. The county and city inspection sticker is the easiest thing to check and the easiest thing to fake, so look for depth and placement, not just presence. A real sticker goes on in the field at final inspection. One that looks adhesive-fresh, sits on top of a layer of dust, or shows a permit number you can look up and find closed as “incomplete” is a problem.
Here’s what we check in the first twenty minutes:
- Ceiling height mismatch at an addition wall. Walk the seam between the original structure and anything added. A true plate-to-plate match lines up within a quarter inch. When framing was done without drawings, you’ll see a one- to two-inch step, a new soffit that doesn’t align with the old one, or a ceiling plane that sags toward the join.
- Panel box inspection stickers. Open the electrical panel cover (with the main off, or let us do it). A permitted panel upgrade in Huntington Beach gets a sticker. An unpermitted one usually doesn’t, and the dead front may not even match the box brand.
- Framing you can see from the attic hatch. Look for lumber stamped with a grade and species – that’s normal. Look for framing where some studs are stamped and others are bare, oversized, or sistered in with construction adhesive only. That’s a repair, not a build.
- Mismatched window nailing flanges. Windows replaced under permit carry flanges or a flashing detail. Ones swapped by a handyman often sit in the old opening with a bead of caulk and nothing else.
These are the same checks a General Contractor in Huntington Beach runs before writing a scope, because unpermitted work changes what the job actually is.
Which moisture and corrosion signs are unique to Huntington Beach homes?
Huntington Beach sits in a marine layer that pushes salt-laden air against the stucco most mornings and pulls it away by early afternoon. That wet-dry cycle is hard on fasteners and flashing, and it’s why coastal homes show moisture damage in patterns you don’t see ten miles inland. The salt in the air accelerates corrosion on any steel that isn’t properly isolated or galvanized.
The specific signs to look for:
- Rust staining at fastener heads through stucco. Small brown bleed marks in a grid pattern are the heads of the lath nails or screws corroding. It means water is getting behind the stucco and reaching the metal. On a house near the pier or along the bluff, this can happen within two or three winters of a bad installation.
- Efflorescence at the slab edge. That white, chalky bloom where the foundation meets the wall is salt being pushed out as moisture evaporates. A little at one spot is normal. A continuous band along a whole wall means water is migrating behind the stucco and coming out the bottom.
- Window frame discoloration. Dark streaks on the interior sill or frame corners, mostly at the bottom and along the head, point to flashing that doesn’t shed water to the exterior. In coastal Huntington Beach, look at the leeward side too – wind-driven rain gets in where you’d least expect it.
- Soft, blackish wood at sheathing. Any spot you can press a key into and it sinks is rot, and behind stucco it can be hidden for years. Fresh paint is the most common cover-up.
If you see these, don’t just re-stucco the surface. The substrate behind has to come out. Cambria quartz on the counter is worthless if the wall behind it is growing mold.
How can you tell a tile or flooring job skipped substrate prep?
A tile or floor installation that skipped substrate prep (the moisture-resistant layer and leveling that sits under the finished surface) fails in predictable ways. You don’t need to rip anything up to catch it. You need to walk, tap, and watch the grout.
- Tap with a knuckle or a screwdriver handle. Solid tile over a proper cement board substrate sounds dense and uniform. A hollow “thunk” is a void, which means the thinset wasn’t burned in – a common shortcut that leaves 30 to 50 percent of the back of the tile unglued.
- Stand with your weight on one foot and shift. If a tile flexes, even a hair, the substrate is too thin or not attached properly. On a bathroom floor, that’s often a single layer of plywood where code and good practice want more.
- Read the grout cracks. Hairline cracks that wander on a diagonal are usually normal settling. Cracks in a straight line across the room, or cracks that follow the perimeter joint, are a control or perimeter joint that was never filled with flexible sealant. That’s a sign the installer didn’t know the detail.
- Check the transition at doorways. A schluter strip or a proper threshold should be there. Carpet or tile butted straight to vinyl plank with a squirt of caulk is the tell that nobody planned the layout.
If the floor is soft and taps hollow in more than a few places, the flooring is a symptom. The subfloor and the framing below need a look before you budget the replacement.
What electrical and plumbing shortcuts show up during remodels?
This is the category where cutting corners becomes dangerous, and it’s the one most homeowners can’t spot without opening a wall. Electrical panel work, particularly, is not a place for a general handyman. If you’re going to have any of this looked at, it’s a job for a trained, licensed professional. We’ll tell you what to look for, not how to fix it yourself.
Electrical red flags:
- Aluminum branch wiring in a mid-century Huntington Beach tract home that’s been spliced to copper with nothing but a wire nut and tape. Proper connections use a listed pigtail or an approved connector, not tape.
- An electrical panel with no inspection sticker, or a panel brand that doesn’t match the box it’s bolted to. That’s often a “guy who knew a guy” install.
- Receptacles with a newer grounded face on an old two-wire circuit. The ground prong is there, but behind it is nothing. Check with an inexpensive GFCI tester.
- A subpanel fed with undersized wire or a neutral and ground bonded together in a panel that’s not the main service. That setup creates a shock hazard that shows up years later.
Plumbing red flags:
- Polybutylene supply pipe, the grey plastic that was common in the 1980s. It’s not banned, but the fittings fail, and any remodel that exposes it should replace it.
- A water heater with no expansion tank and a cold inlet line that has scale at the union. Salt water and marine air mean you should check for corrosion at every fitting.
- Sanitary tees turned in the wrong direction, or a drain that goes uphill to meet the stack. That’s a non-licensed install, and it clogs on a schedule.
When you’re planning a bathroom remodel, these checks go into the scope before the tile comes out. Our Bathroom Remodeling in Huntington Beach process writes the electrical and plumbing corrections into the written price, so there are no surprise change orders after demo day.
How to read an attic for cut corners
The attic is the one place in the house where a homeowner can see the framing, and it’s where unpermitted modifications are most obvious. Take a bright flashlight up in daytime and look closely at the roof framing, not just the insulation.
Look for these signs:
- Cut or notched rafters. Any rafter or ceiling joist that has a notch or a hole wider than a third of its depth was likely weakened for a plumbing or HVAC run. A proper repair adds a sister joist or a header. A quick fix just leaves the notch.
- Framing lumber in different colors or species. Old-growth fir from the 1950s next to fresh pine from a recent repair is normal. A mix where one whole section is fresh and the rest is old, particularly around an added wall, points to an addition that was framed in by a crew without drawings.
- Sistered joists held with nails only and no adhesive. New sistering should use construction adhesive and structural screws or lag bolts. A row of 16-penny toenails is a handyman repair, not a structural fix.
- Sagging or a dip in the ridge or a valley. If the roofline is straight on the exterior and dips inside at the same point, you’re looking at a load that’s not carried properly.
Huntington Beach has plenty of 1950s and 1960s ranch homes where a previous owner opened a wall between the kitchen and the family room without a header. That’s the single most common unpermitted change we run into, and it shows up in the attic as a bearing wall with no support above.
How to photograph and document warning signs before hiring
This is the step most homeowners skip, and it’s the one that saves money. A contractor’s willingness to price a job off photos and measurements tells you something about how they’ll work. More importantly, documentation ties the scope of work to physical evidence, so a bid can be compared apples to apples.
Do this before you ask for a single bid:
- Photograph each sign with a scale and a date. Put a tape measure or a coin next to the rust stain, the grout crack, the notch in the joist. Camera timestamps are fine, but include something that shows size.
- Write a one-page log. For each photo, note the room, the location, and what the sign is. Number them so you can reference “Photo 4, efflorescence on the north slab” in your bid requests.
- Open the electrical panel once, with the main off, and photograph the label and the interior. Do not touch the wiring. If you’re not comfortable opening the cover, get a licensed electrician to do it and document it. Panel work is a genuine shock hazard, and it belongs in a professional’s hands.
- Take a moisture reading if you can. An inexpensive pin meter on the stucco and on any suspect interior sill will give you a number to quote. Anything above roughly 18 to 20 percent is worth flagging to a contractor.
- Keep a copy of every bid and every change order. The written price you sign before work starts should be the price on the final invoice. That’s the whole point of the documentation.
Our Penhallow Remodeling Huntington Beach home page describes the same standard we apply on every estimate: written price before any work starts, a defined arrival window, and a 365-Day Done Right Promise that covers the work for a full year.
How to turn evidence into a written scope of work
A verbal estimate is a guess with confidence behind it. A written scope of work is a document you can hold a contractor to. When you hand your photo log and notes to a contractor, the bid should line-item each repair instead of lumping everything into one number.
What a written scope should include on a Huntington Beach job with documented damage:
- A line for demo and inspection of any wall showing moisture signs, with a stated allowance for what might be behind the stucco and how that allowance will be priced if it’s higher.
- A line for the electrical corrections, separated from the rough and finish work, so you can see the licensed sparky cost separately.
- A line for substrate replacement in any area of hollow-sounding tile, priced per square foot.
- A stated brand and style for materials – “Wellborn cabinetry, shaker door, painted finish” is specific. “Quality cabinets” is not.
- The guarantee terms written into the contract: what’s covered, how long, and what “we make it right” means in practice. Our promise is on every project and it’s called the 365-Day Done Right Promise for a reason.
The Kingswell Way is simple, and it’s the standard we hold to: say the price before the work, show up in the window we gave, leave the place cleaner than we found it. If you’re comparing bids, put that standard next to each contractor’s and see who actually meets it. A kitchen remodel with Wellborn cabinets and Caesarstone counters is a significant investment, and it should come with a written number before a single cabinet comes out.
Common Mistakes to Avoid
- Trusting fresh paint and new caulk. A seller or flipper paints over moisture damage in the last month before a listing. Look for paint that’s newer on one wall than the rest, and caulk that’s still soft where the rest has cured.
- Skipping the attic and the panel. These are the two places where unpermitted work is easiest to spot and easiest to miss. Bring a flashlight in daylight, and photograph both.
- Accepting a verbal estimate. A verbal number changes after demo day. A written price with line items is the only thing you can compare against a second bid.
- Paying for a full cash deposit with no written scope. A deposit is normal. A deposit without a written scope and written guarantee, not so much. The number on day one should be the number on the invoice.
- Hiring the cheapest bid for structural work. Structural work on a Huntington Beach home in the marine layer fails differently than inland. Cheap framing in a house five minutes from the beach is a five-year problem, not a fifty-year one.
- Ignoring efflorescence on the slab. A lot of homeowners on their second or third home chalk it up to “California.” It’s water, and it’s coming from somewhere.
- Letting the tile guy handle the electrical. Electrical panel work, gas and structural changes belong to licensed trades. When a general contractor says they’ll handle it all, verify they’re pulling permits and are licensed to do so.
- Comparing bids without a shared scope. Two bids for the same kitchen can differ by $15,000 because one includes the substrate repair and the other pretends it isn’t there. Stick to one written scope with each line item.
See the difference
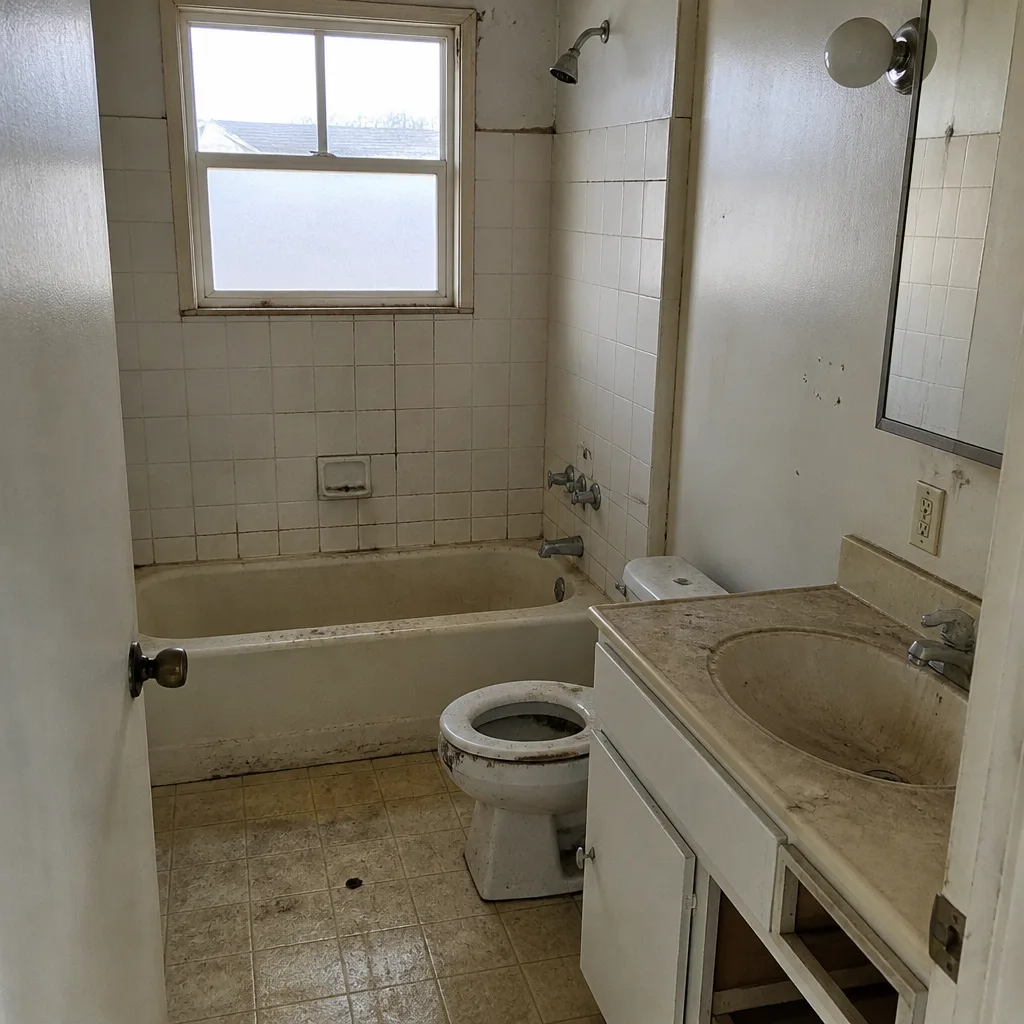 Before
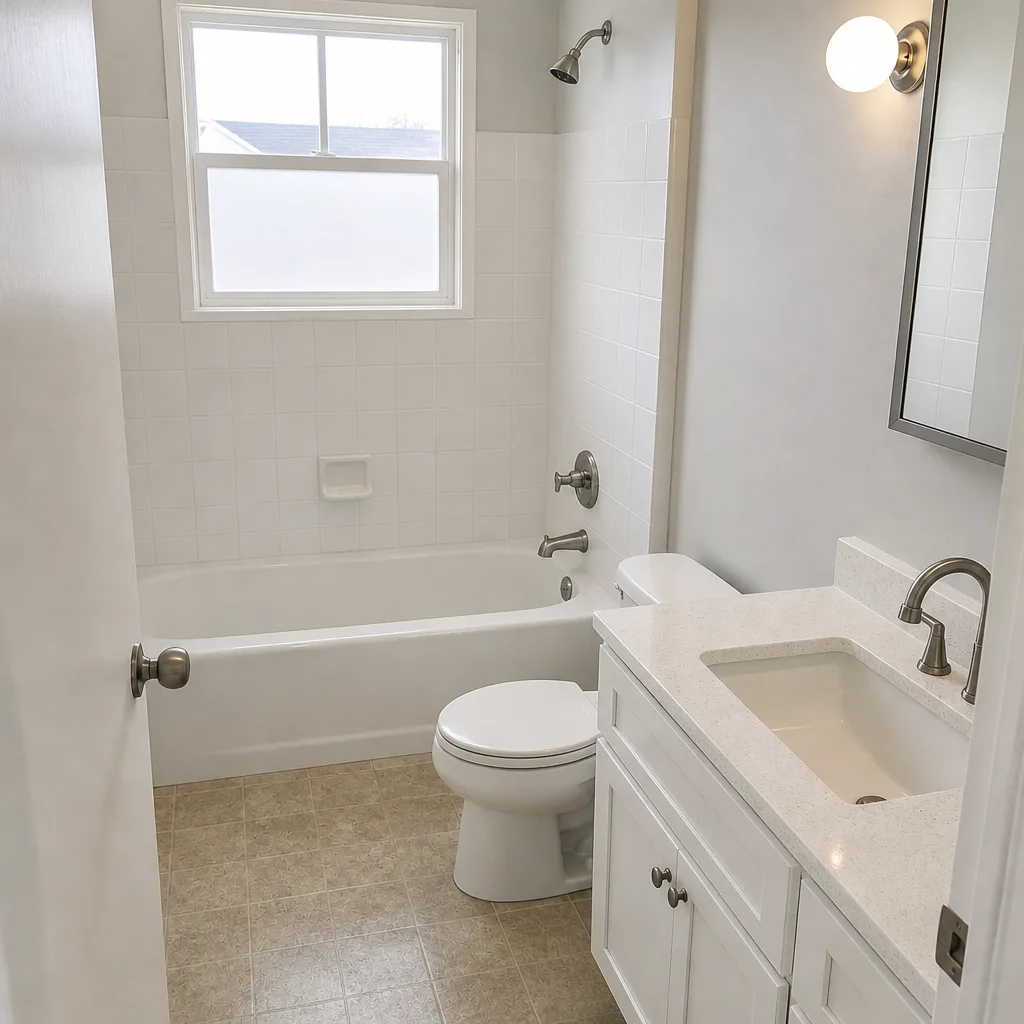 After
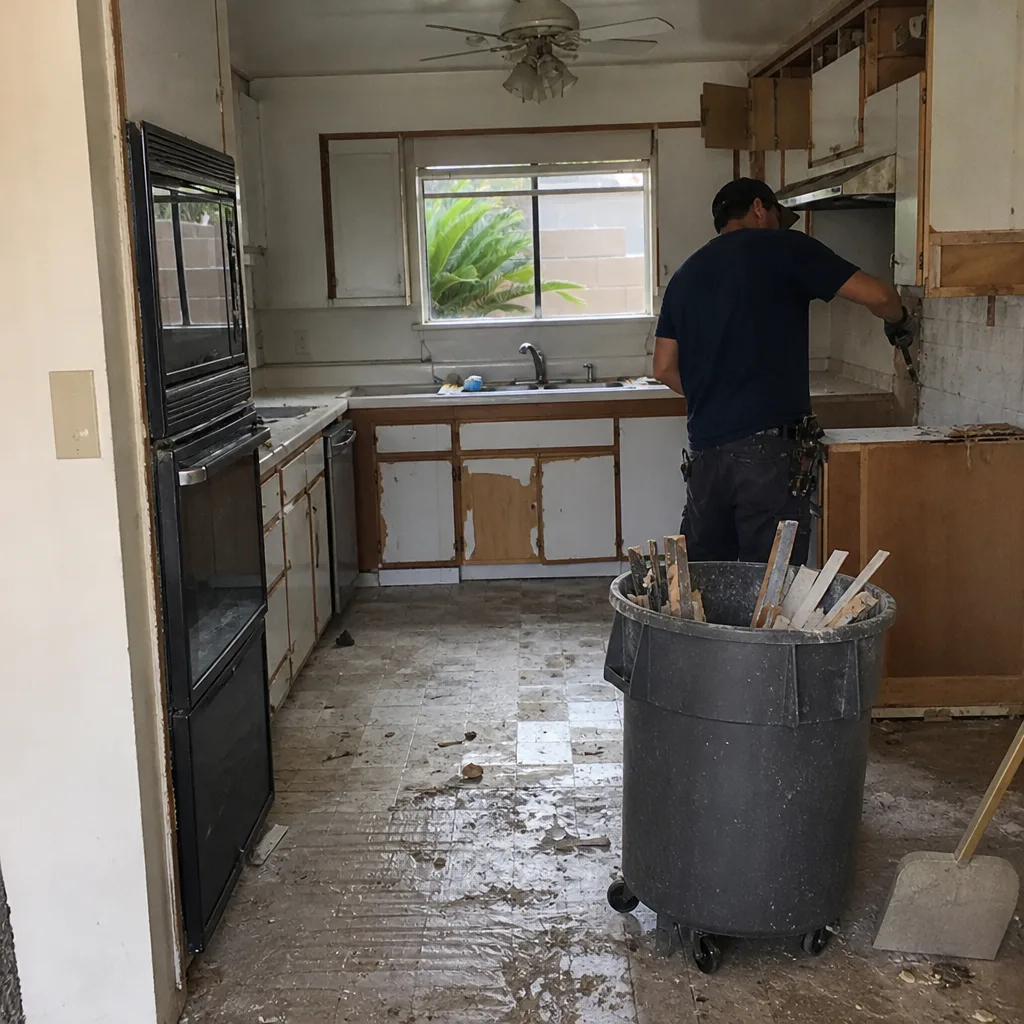 Before
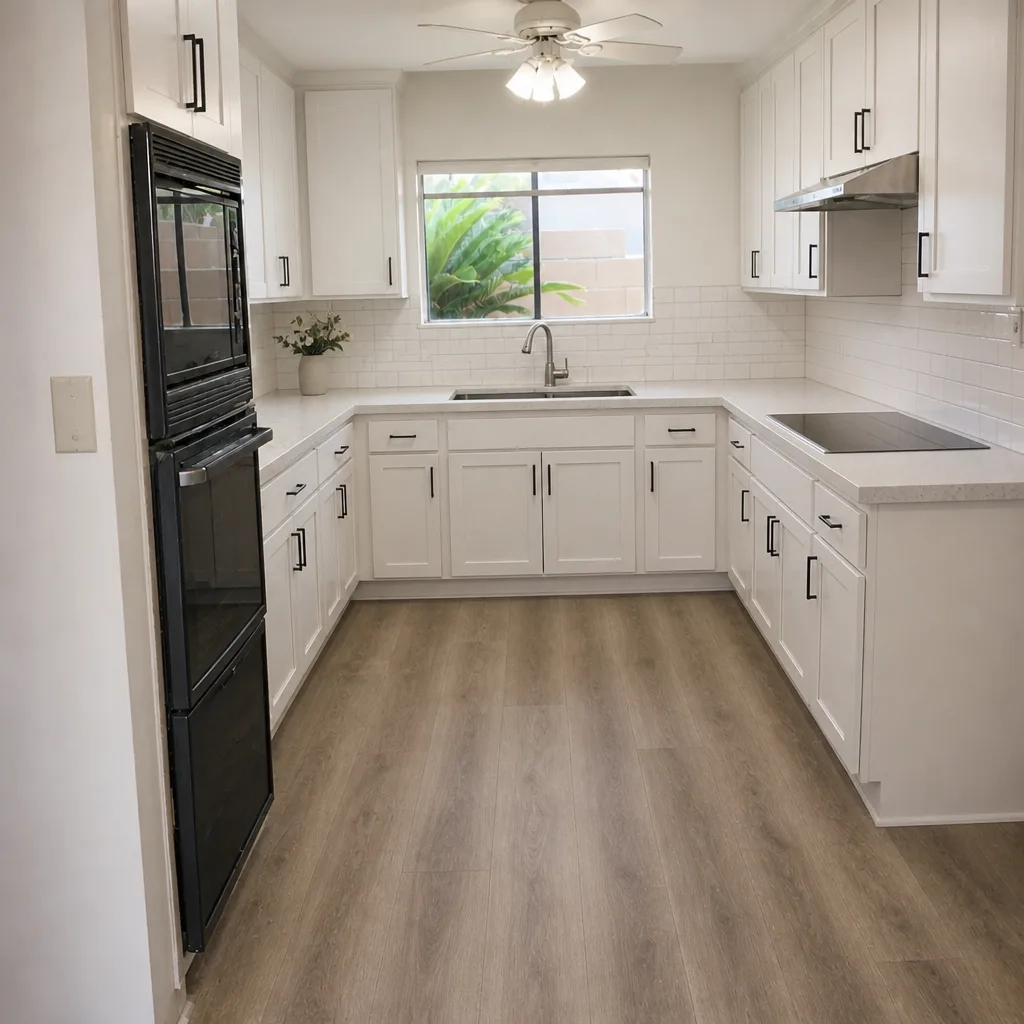 After
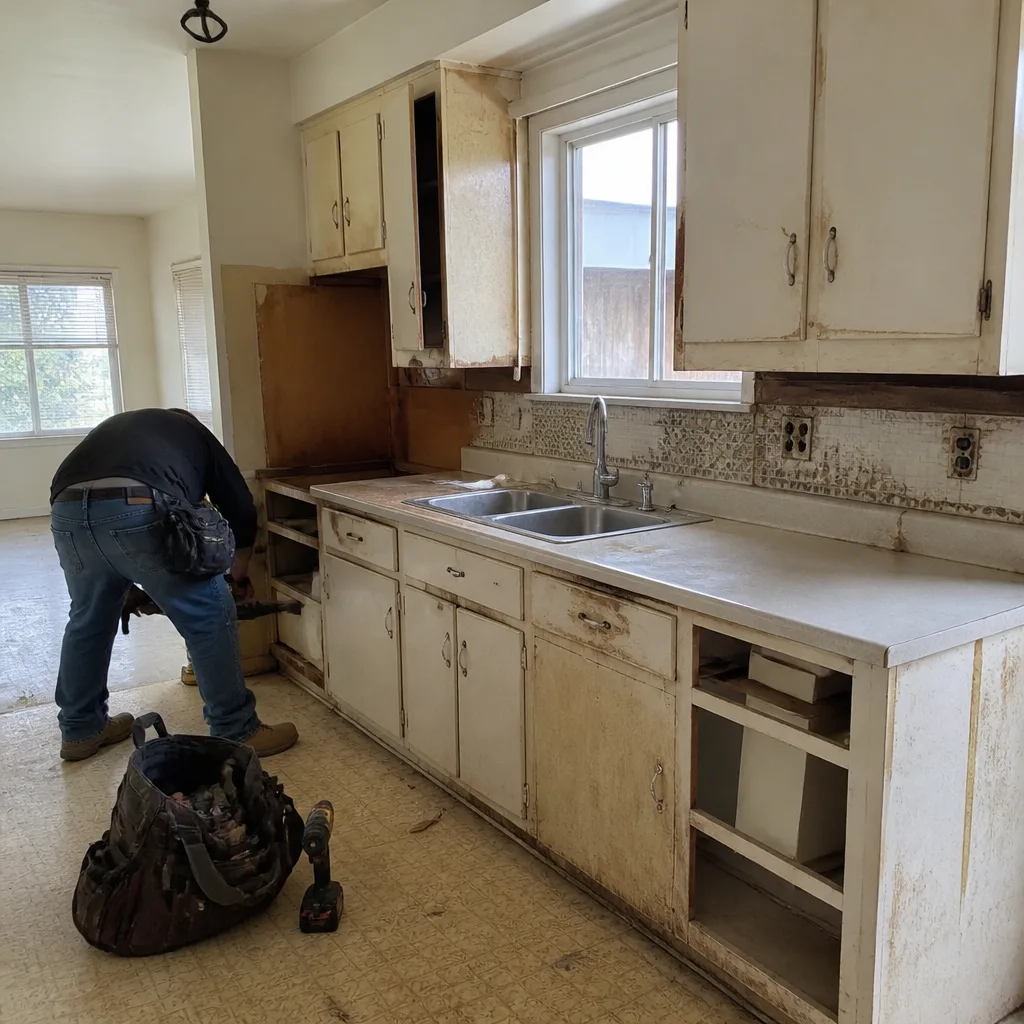 Before
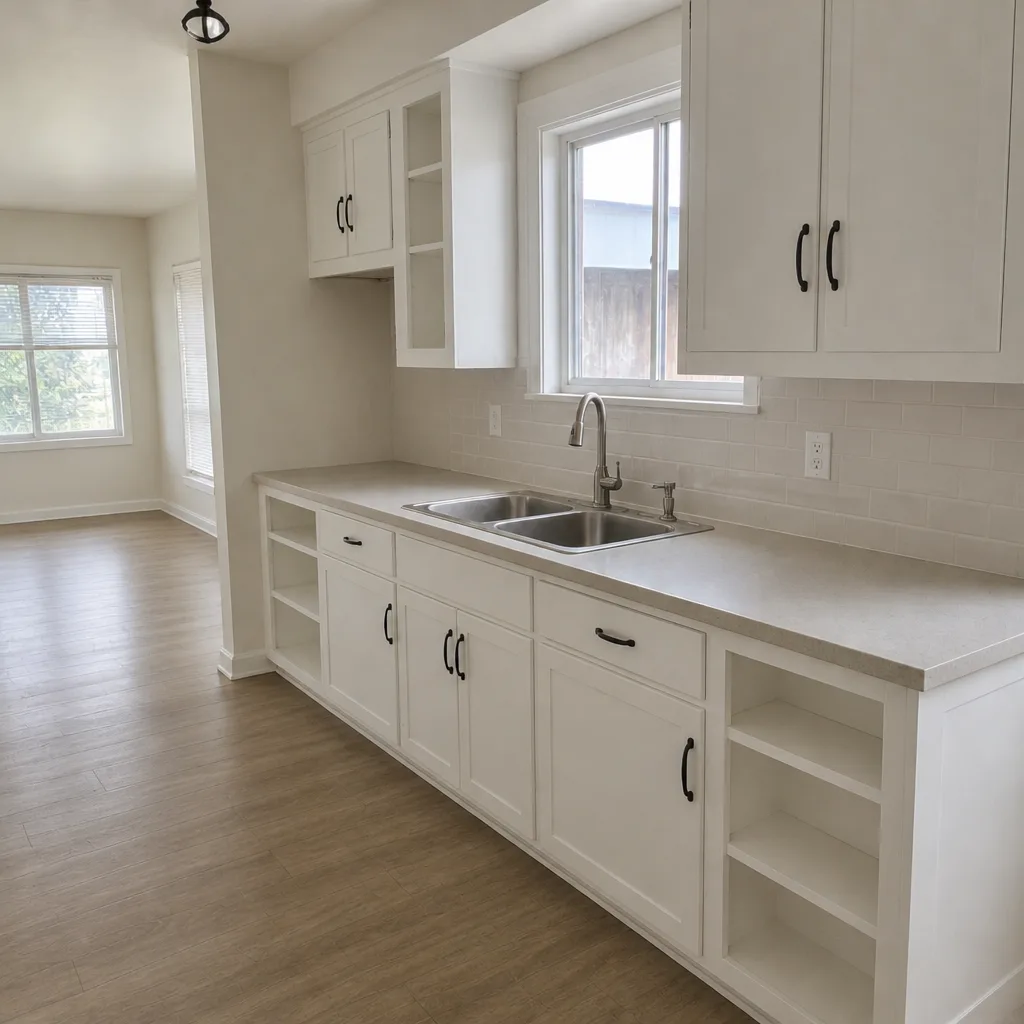 After
When to Call a Professional
Call a professional when you see any of the following: rust bleeding through stucco in a grid pattern, a band of efflorescence along a slab edge longer than a few feet, hollow-sounding tile over a large area, a ceiling that dips at a wall seam, a panel with no inspection sticker, or framing in the attic that’s been notched and not repaired. Also call if a wall feels soft, a floor squeaks and moves underfoot, or a window frame has dark stains on the interior sill. These aren’t cosmetic. Each one is a sign something was done without the substrate, flashing, or licensed trade that makes it last. Penhallow Remodeling Huntington Beach offers free estimates in Huntington Beach and will walk the house with you, write down what we see, and put the price in writing before any work starts. Call (888) 329-8145.
Frequently Asked Questions

The fastest checks are inspection stickers in the electrical panel, ceiling height mismatches at addition walls, and mismatched framing in the attic. A permitted job in Huntington Beach usually leaves a sticker on the panel and a paper trail in the city’s online permit lookup. No sticker plus a recent-looking panel install is worth a second look before you price any work. Call (888) 329-8145 if you’d like a free walkthrough and written observations.
Salt air plus the morning marine layer accelerates corrosion on nails and screws behind the stucco. Water gets in through a flashing or sealant failure, reaches the metal, and the rust migrates out as a brown stain in a grid pattern. It’s most common on walls facing the ocean or the wetlands, but it can happen anywhere the detail work was skipped. A licensed contractor can trace the water source and price the repair.
A little white chalky bloom at one spot is normal and often harmless. A continuous band along a whole wall means moisture is migrating behind the stucco and evaporating at the bottom. Left alone, that moisture rots sheathing and framing. Have it photographed and priced before you start any interior remodel so the wall doesn’t have to come out later.
Hollow sound means the tile wasn’t fully bonded to the substrate, which is a classic shortcut when the installer skips the cement board or burns in the thinset. It usually fails within a few years, and the grout cracks give it away. If several tiles are hollow, the floor replacement should include the substrate. Our Kitchen Remodeling in Huntington Beach scope prices that repair as a line item so it doesn’t become a surprise.
Yes, and it’s written into our promise. The 365-Day Done Right Promise covers every project for a full year – if the work fails inside that period, we come back and fix it at no charge. A free second visit is included if a repair fails, with no service call and no re-inspection fee. Write it into the contract so it’s clear what “we make it right” means.
Yes, in most cases. Electrical, plumbing and structural changes all require permits, and the city inspects them. Some finish-only work is exempt, but any change to the panel, a wall, or a drain line needs an inspection sticker when it’s done. A licensed general contractor should pull the permits and pass the inspection before final payment. Call (888) 329-8145 to walk through your project and what it needs.
The Bottom Line
The warning signs that matter in a Huntington Beach home are physical, not conversational. Rust bleeding through stucco in a grid, chalky efflorescence along the slab, mismatched ceiling heights at an addition wall, missing panel stickers, hollow-sounding tile, and un-repaired notches in attic framing are each a sign that somebody built or repaired something without the detail work. Photograph them with a scale, write a one-page log, and put that evidence in front of every contractor you ask for a bid. The written scope should tie each sign to a line item and a written price before anyone picks up a tool. If you want a second set of eyes, our team at Penhallow Remodeling Huntington Beach will walk the house with you.
Call (888) 329-8145 for a free estimate. We’ll put the price in writing before any work starts, and back it with the 365-Day Done Right Promise. A live person answers the phone, not a voicemail prompt, so you’ll talk to someone who can help.
Written by the team at Penhallow Remodeling Huntington Beach.